So you’ve just been assigned as an Event Administrator for a group on OpenSports? Congrats!
As an Event Administrator, you have access to a powerful set of tools. You can create, edit, and repeat events; send invites; view and manage the attendee list—including checking in or removing attendees; and even issue refunds for event orders. You can also assign roles like event admins, managers, or assistants to help run your events more efficiently.
Here are a few important things you should know before your first event:
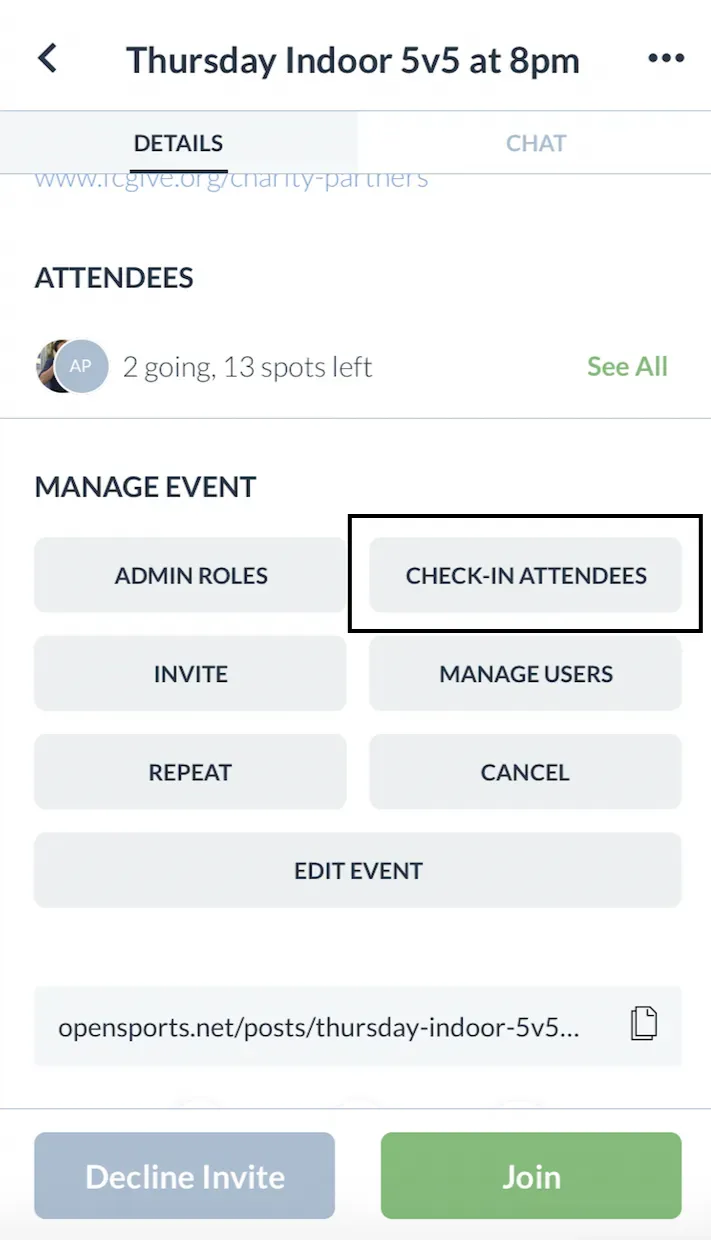
1. How to check-in attendees
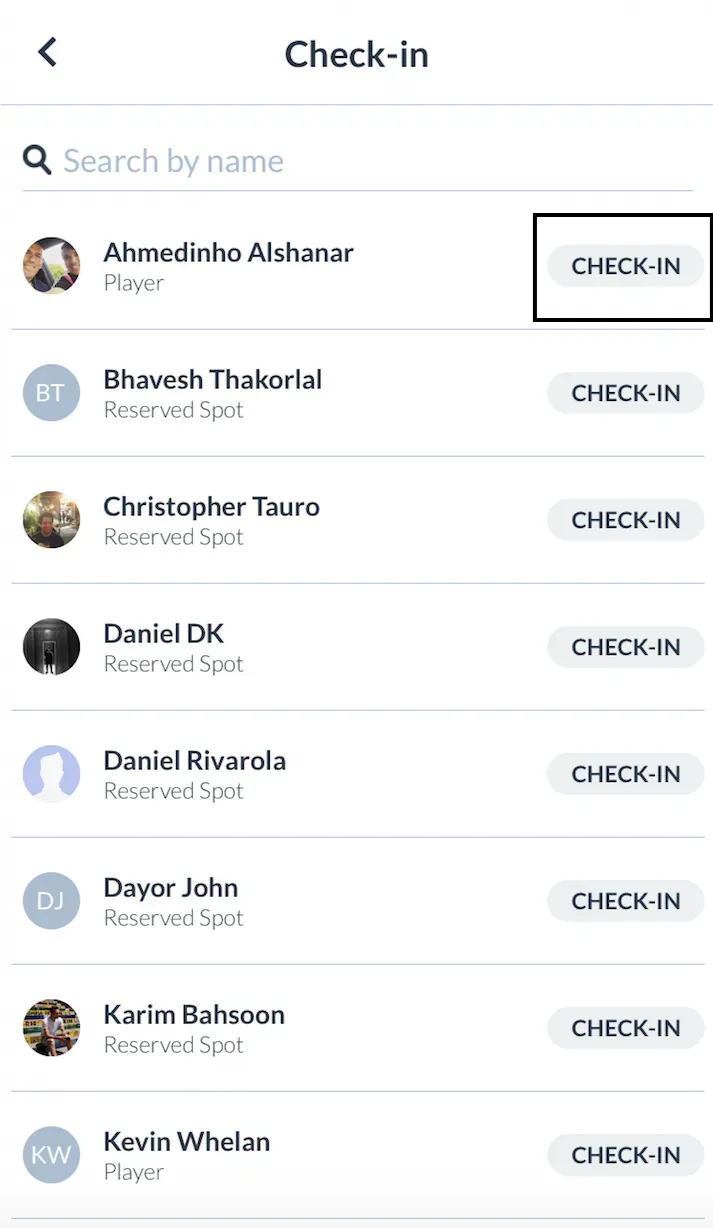
- Go to your event (on web or app) > Click on Check-In Attendees > Click on “Check-in” for the players that are at your event
- You can go back and modify your check-in list at any time!
You can also read more info about how to check-in attendees.


Tip: When checking in attendees, you use the search bar to quickly find names!
2. How to view (and remove) attendees
Go to your event > click on “Manage Users” > Under the “Attending” Tab, look for the name of the player and swipe from left to right on their name (you can do this on web, too) > Tap “Remove Order” and you will be prompted to add a message about why you removed them, if you’d like.
The player will automatically be removed from the event chat, as well. They will automatically be refunded if you removed them by the refund deadline.
3. About the waitlist
When an event fills up, the OpenSports waitlist turns on, and automatically monitors and coordinates RSVP’s for you. Here’s how:
- If your event fills, people will be able to click “Join Waitlist” (on App & Web)
- If someone in your event cancels their RSVP, the first person on the waitlist will receive an email and a push notification from OpenSports, asking if he or she would like the available spot
- If you need to quickly fill up a bunch of spots at the last minute, you can cancel the waitlist (click here to read about how to cancel the waitlist).
- View who is on the waitlist by going to your event and clicking on “Manage Users”
Note: Nobody (not even the group admin) can re-arrange the waitlist.
4. Reminders, Reviews, and Repeats!
- Players who join your games will get an automated reminder message about he upcoming event, 24 hours before it starts, through the app or email depending on if they are using the app or web.
- We always prompt players to leave you a review after their first game that you organize; these will help build your credibility as an organizer! This review will live at two levels: your own player profile, and the group level.
- To easily post the event again, you can click “repeat event”, and all of the same info will auto-fill for one week later!
5. Sending Refunds
Go to your event > Tap on “Manage Users” > Under the Attending list, swipe from left to right on the name of the player you want to refund > Click “Refund Order”. That’s it! The player will get a notification (app or email) as soon as the refund is issued and the money will go into their bank account in 7–10 business days. Be sure to review all the details about sending refunds.
Managing pickup events is a lot of fun, and is made so much easier with OpenSports’ simple but sophisticated suite of sports specific tools (how’s that for a tongue twister 😝)!
Questions? Send them our way: support@opensports.net