This article is the second part of a three-part tutorial on getting started with OpenSports leagues. It is assumed that you have already completed Part I and have created a league. Part III) is about setting up an elimination/cup/playoff round using the league standings.
In the article, we’ll walk you step-by-step on how to set up a schedule of round robin matches.
Let’s begin!
0. Before we start
Please confirm you have access to all of the following. If not, please revisit Part I of the tutorial.
A) An existing upcoming league
B) Teams registered
- The league should have most, if not all, teams registered before you set up the round robin schedule.
- Note: You need a min of 4 teams registered (or min. 4 teams per pool if you set up pools/divisions) to set up a round robin schedule.
1. Navigating Leagues on the web
To start, we thought it’d be helpful to walk through where the Leagues functionality was added to the OpenSports website.
A) League admin views
- To access the main Leagues/Tournaments section on the OpenSports website, click on your profile picture (or circle with initials) (top right corner of OpenSports webpage)
- Tap on “Admin Leagues”
- The Leagues/Tournaments section for admins is organized by each league/tournament. If you are running multiple leagues/tournament, you can switch between them by repeating the process and clicking on Admin Leagues. This is where you will see a list of all your leagues/tournaments
2. Creating a round robin
In this section, we’ll walk through how to set up a round robin for your league.
A) Have teams registered?
In order to create your round robin schedule, at least the min number of teams must have registered (note, if you have a few last minute teams trickling in, you can edit the schedule).
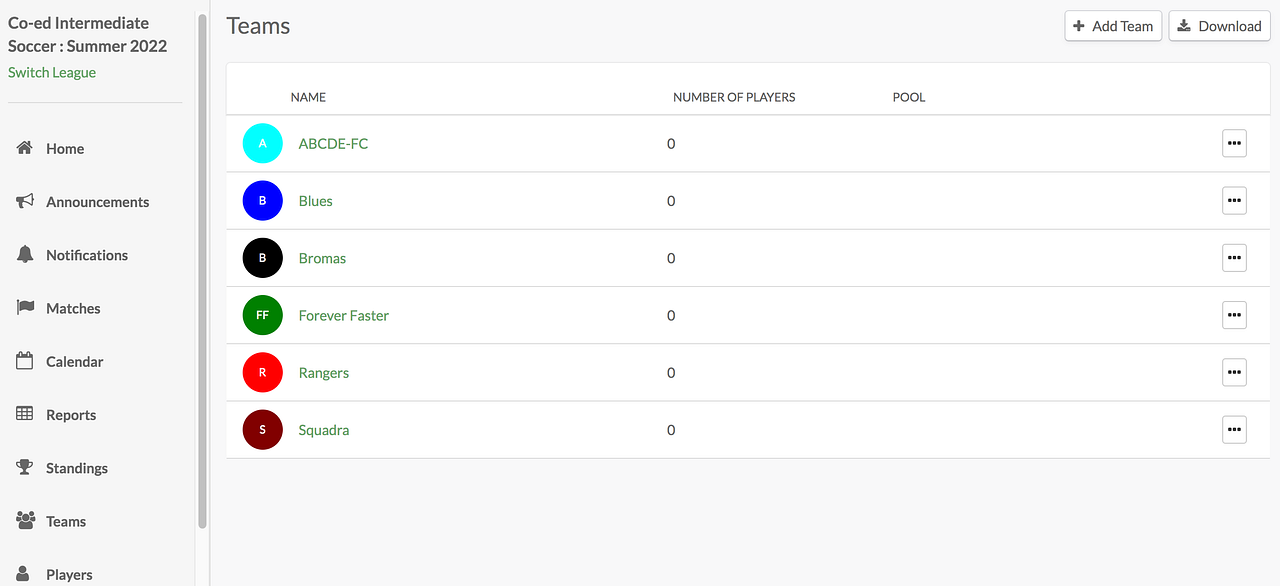
- View the Teams that have registered under Teams
- View players who have registered (and even assign free agents to teams) by tapping on the Players button from the navigation bar
B) Assign teams to pools
This step is only required if you have pools in your league/tournament. If so, we must first assign teams to pools.
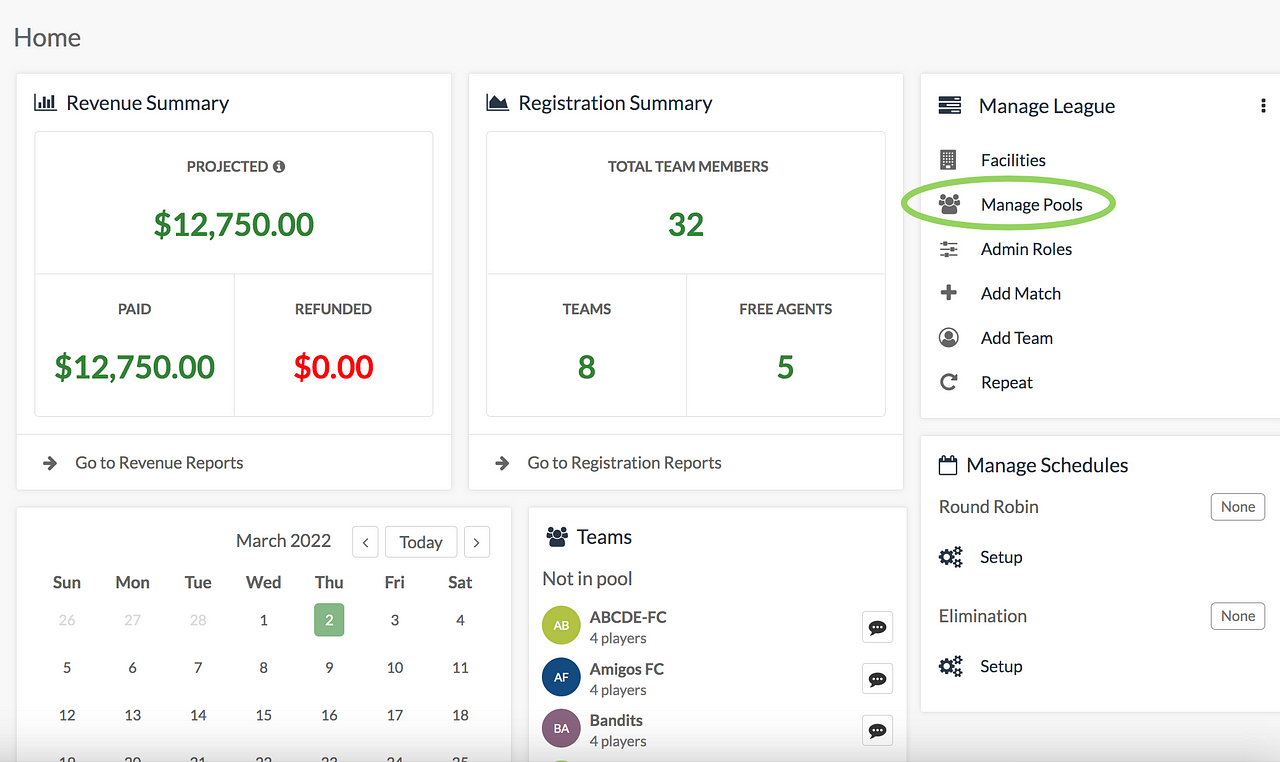
- From the league Home page, click on “Manage Pools”
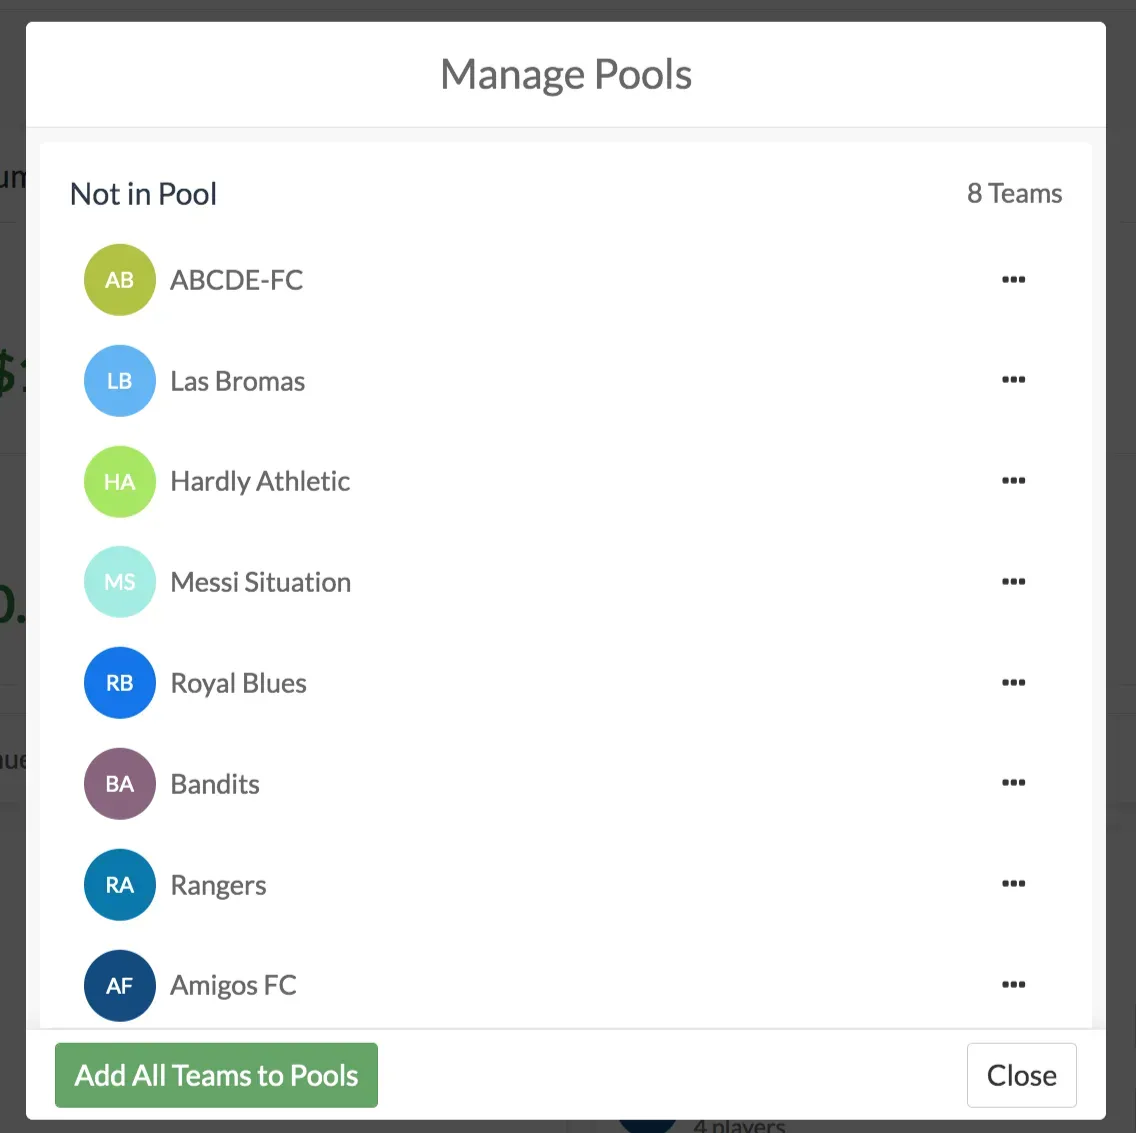
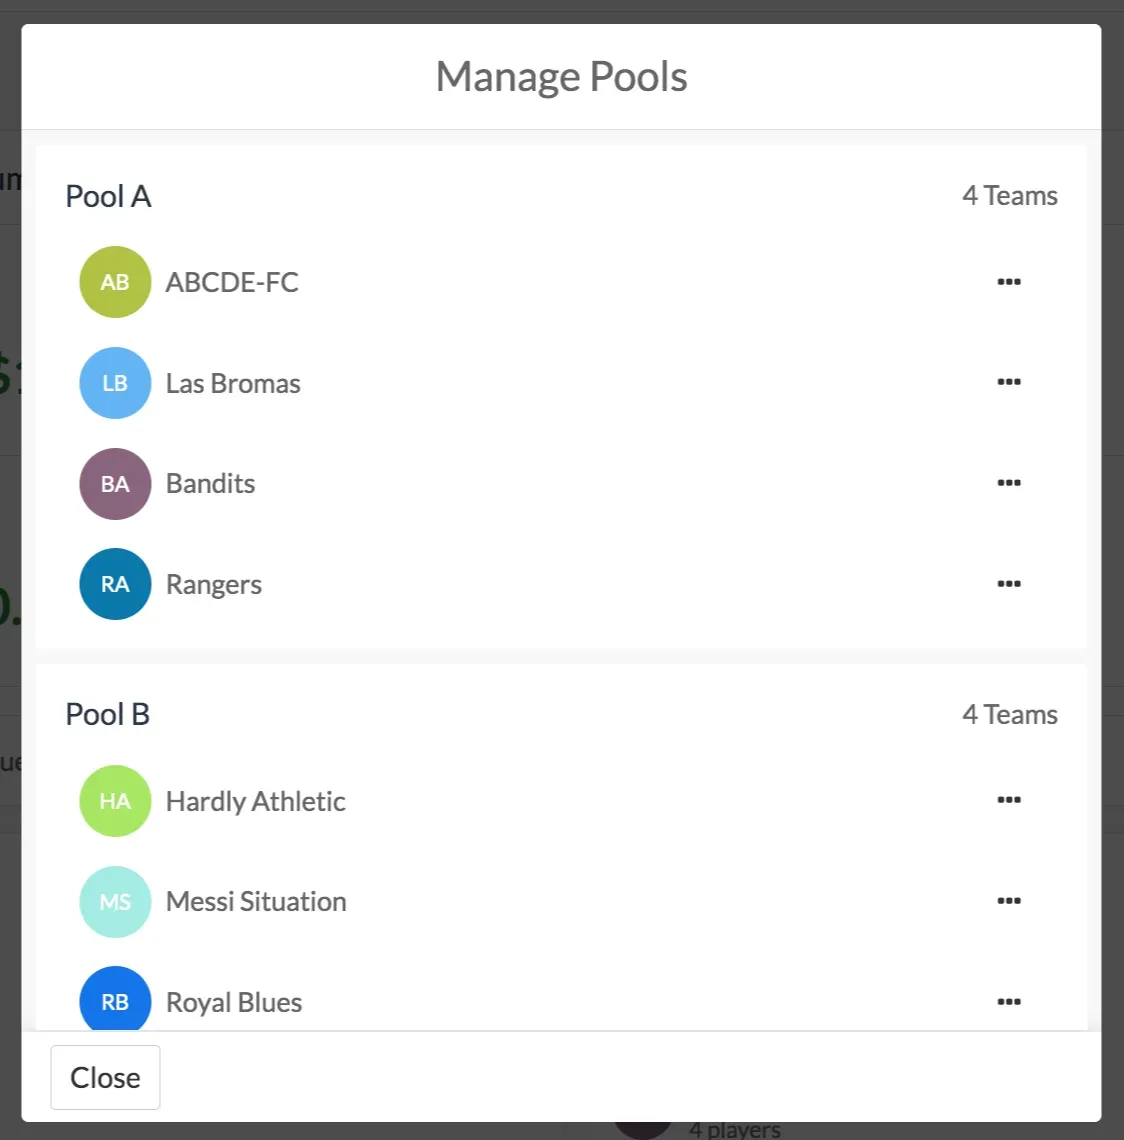
- You will see a list of all teams that have registered to-date. From here, you can either click on “Add All Teams to Pools” (the system will automatically assign all teams across both pools randomly), or manually assign teams to pools, by tapping on the ellipsis (…) to the right of each team name. Don’t worry if you make a mistake, you can always move teams between pools by tapping on the ellipsis (…).
- Once all your teams are assigned to pools, you are ready to create your round robin schedule!
C) Background and terminology
- The concept of a “schedule” is one of the core building blocks behind OpenSports’ leagues/tournaments feature. In short, a schedule is simply a series of matches between teams, each with their own locations and times.
- A schedule can be in one of two states — unpublished or published. A league admin will typically set up an unpublished schedule (which is only visible to league admins), make any match-specific adjustments, review the overall list of matches, and publish it when ready.
- When a schedule is published, a notification will be sent to all teams/players and match-specific notifications (e.g. reminders) will be begin to be sent out as well. While a published schedule can be unpublished, this is rarely necessary as the admin will still be able to edit matches after a schedule is published.
- Currently, OpenSports only allows for 1 round robin schedule and 1 elimination schedule for every league/tournament.
D) Get started
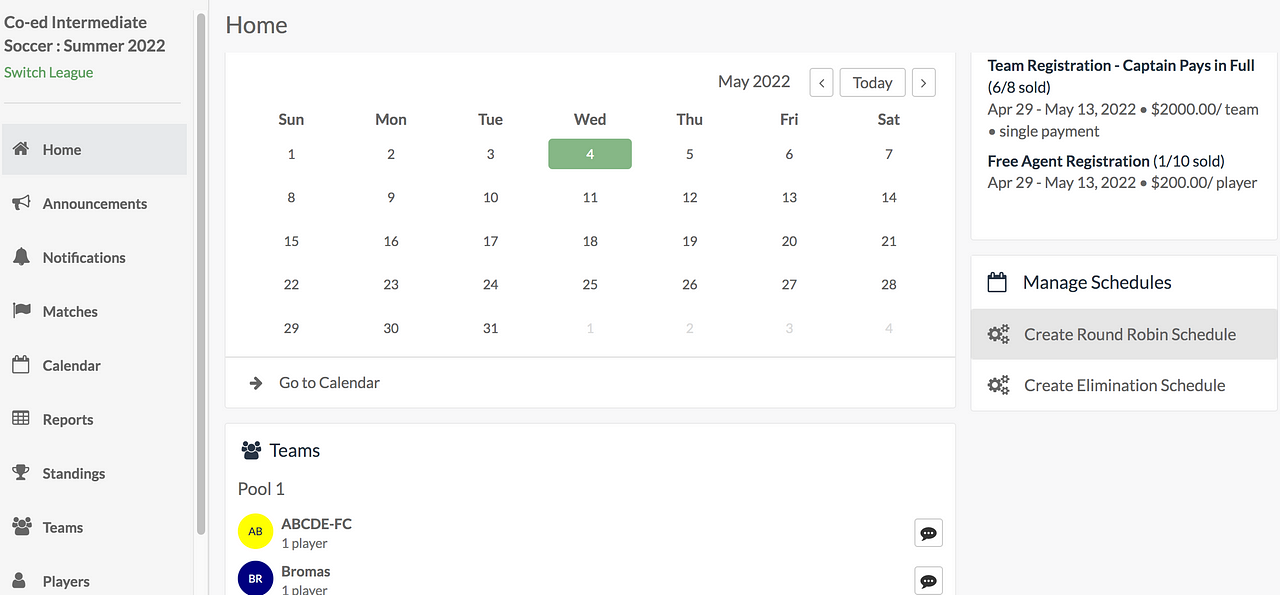
- To initiate the creation of a round robin schedule, navigate to the League Home page.
- Under Manage Schedules, click on “Create Round Robin Schedule”.
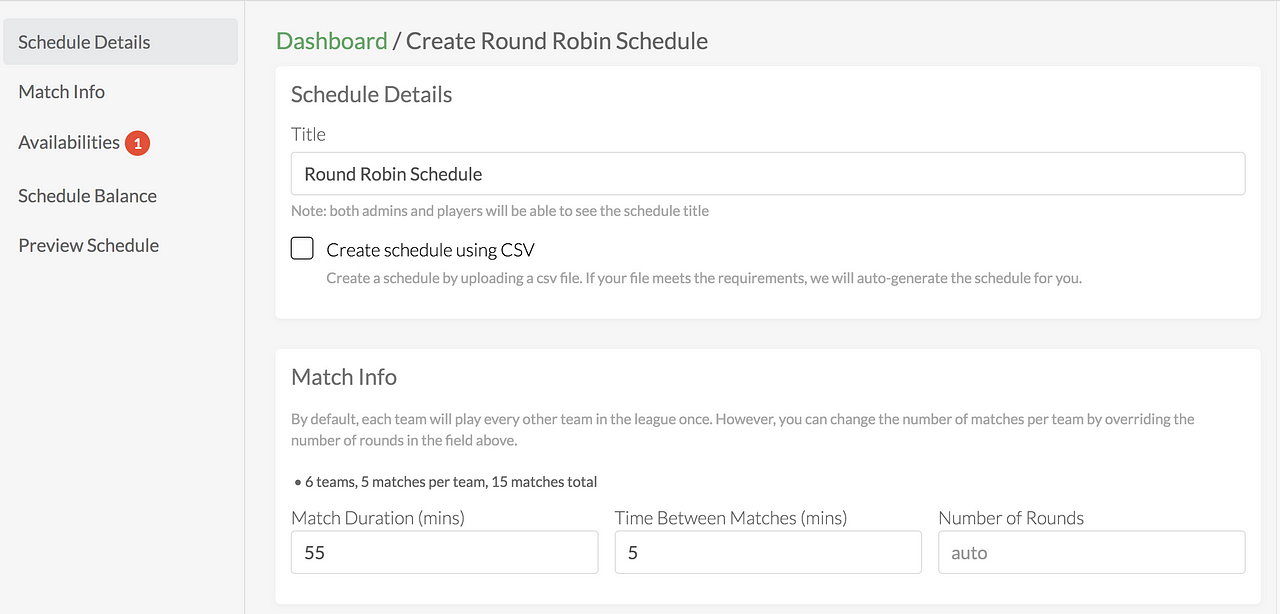
Dashboard/Create Round Robin Schedule
- Schedule Details — You can give your schedule a title, and you can even create your schedule by uploading a CSV.
- Match Info — specify the duration for each match, any breaks between matches, and the number of rounds played by each team.
- The number of rounds refers to how many times throughout the season the matchups will rotate. For example, in a 6 team league, having 5 rounds (5 matches per team) means that each team will get to play each other once, since each team has to rotate 5 times to play the other 5 teams. Likewise, 10 rounds would lead to each team playing every other team twice. The number of rounds doesn’t always equal the number of matches a team will play, since leagues with an uneven number of teams will have teams take turns having byes instead of matches in one or more of the rounds.
- By default (“auto”), each team will play each other team once.
E) Availabilities/Add available time slots
Based on the number of teams, number of rounds per team, and match durations, the OpenSports system automatically calculates the total number of matches for the round robin.
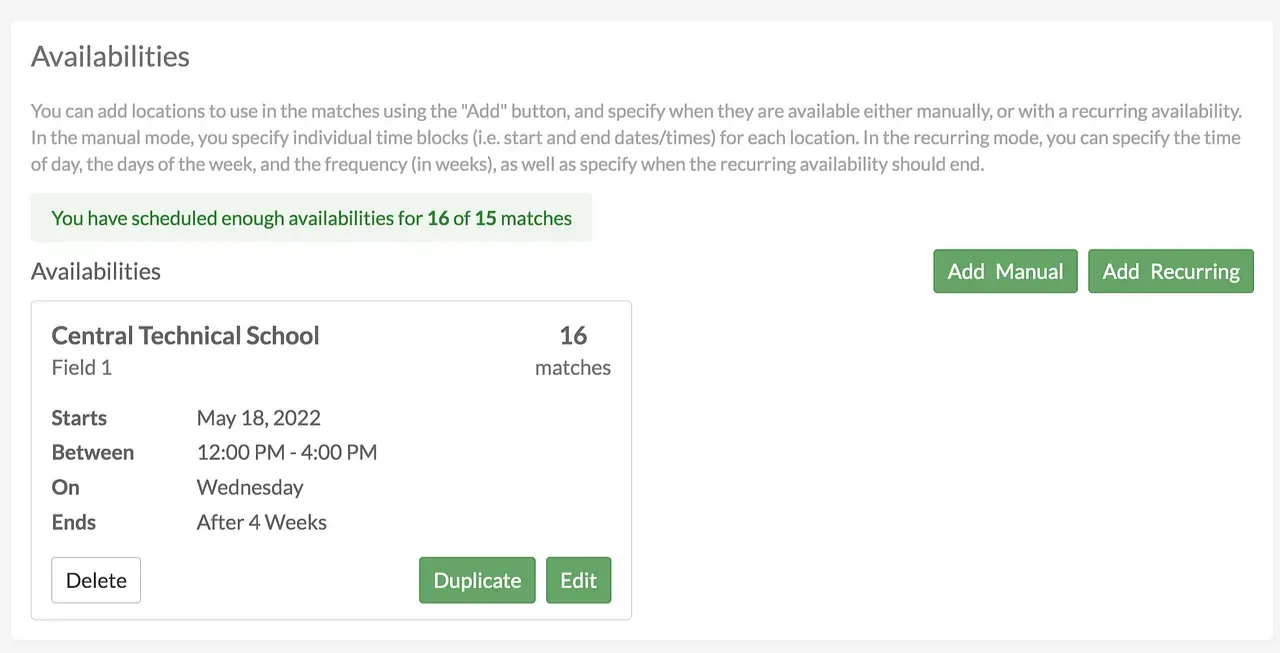
In this step, you need to specify enough available time slots for all these matches so the OpenSports system can automatically assign each match to an available time at a facility.
There are two options: specifying available time slots manually or setting up a recurring schedule. For this tutorial, we’ll add a recurring series of time slots.
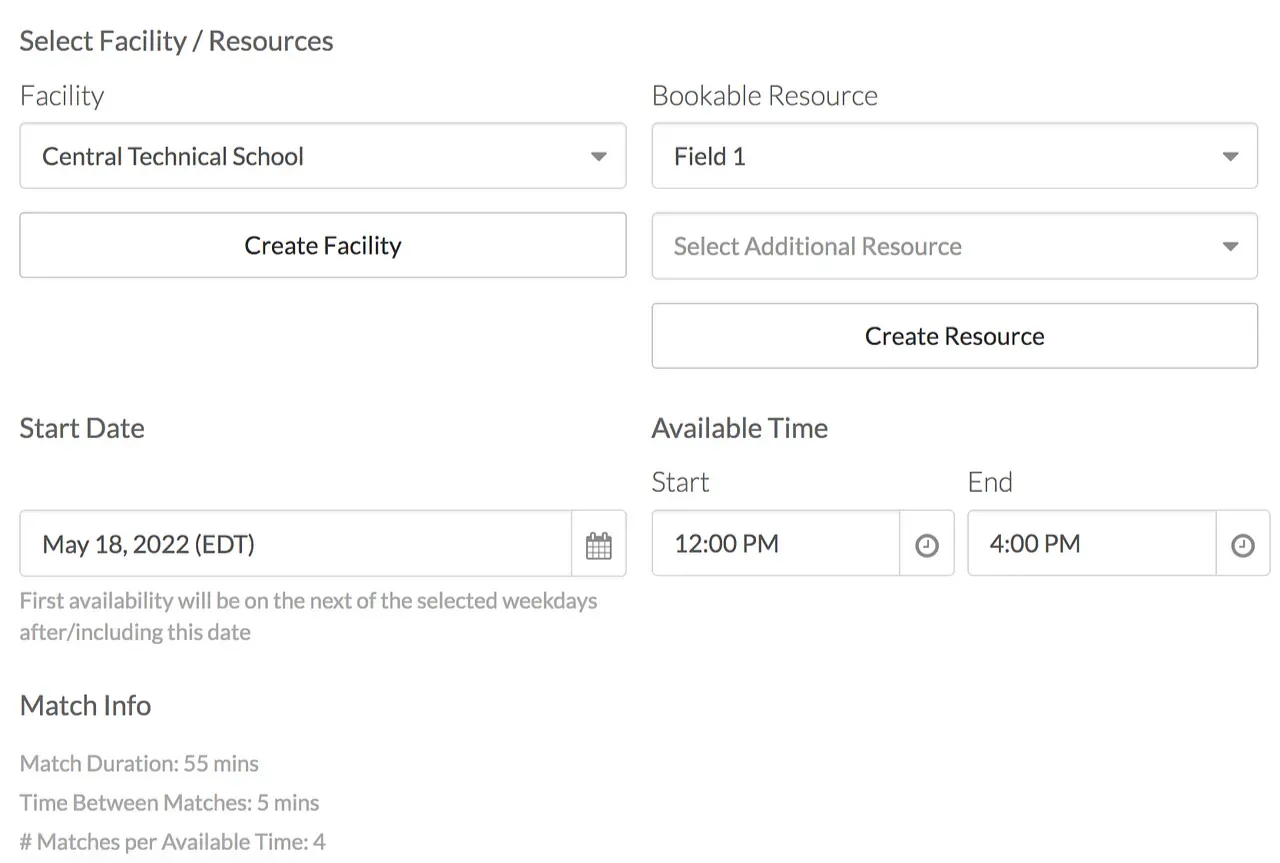
- Tap the “Add” button and select “Recurring”
- Optional — specify a pool if there is a preference for matches for a given pool to be played in a specific location.
- Specify Facility and Resource(s) — For example, Central Tech, Field 1 &2. Note: You may need to create a new facility with resources if required. Facilities are created and shared for your entire group.
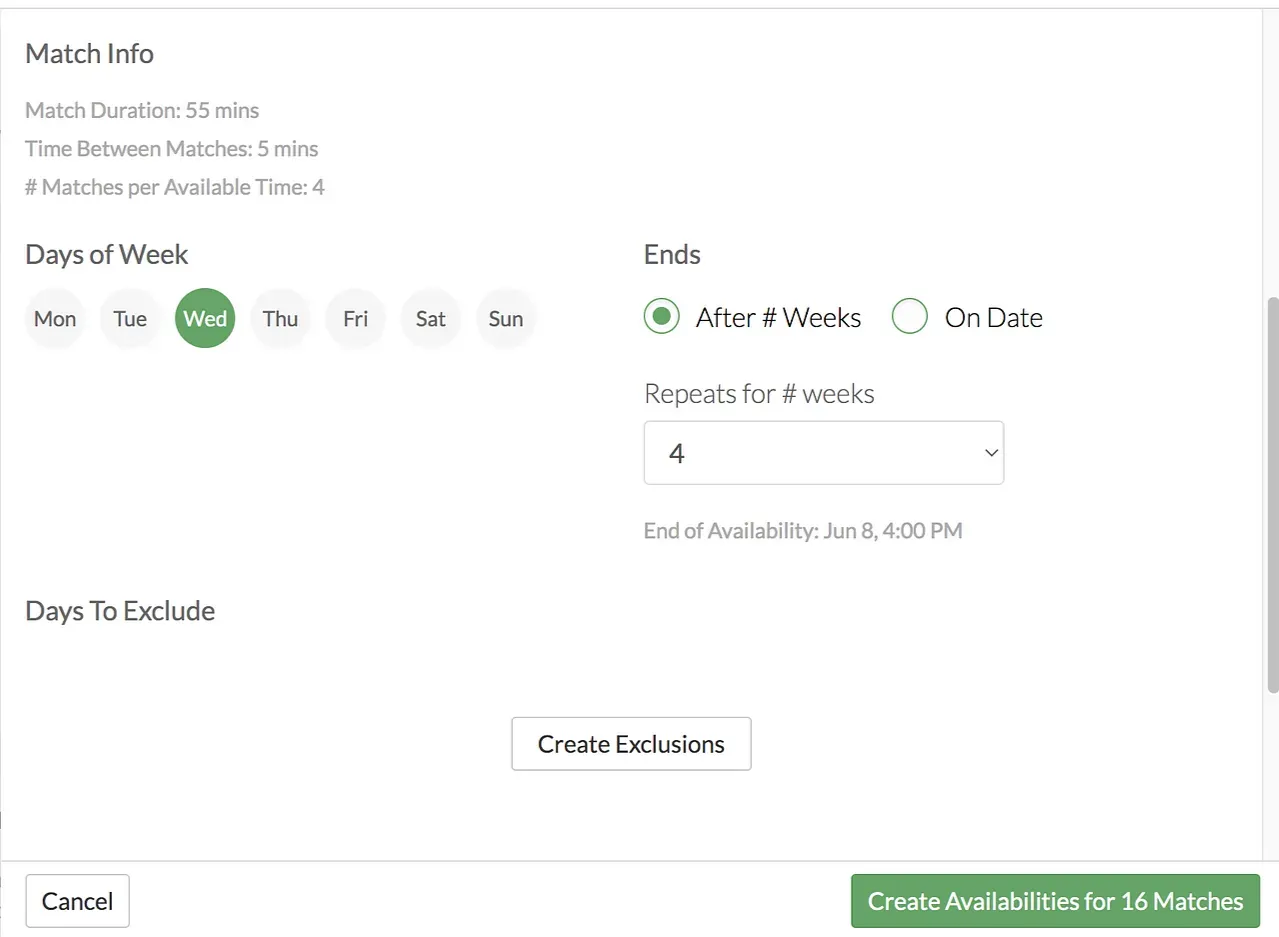
- Specify the available time slots and recurrence schedule (e.g. every Tuesday for 7 weeks, every Friday ending on June 1, etc.).
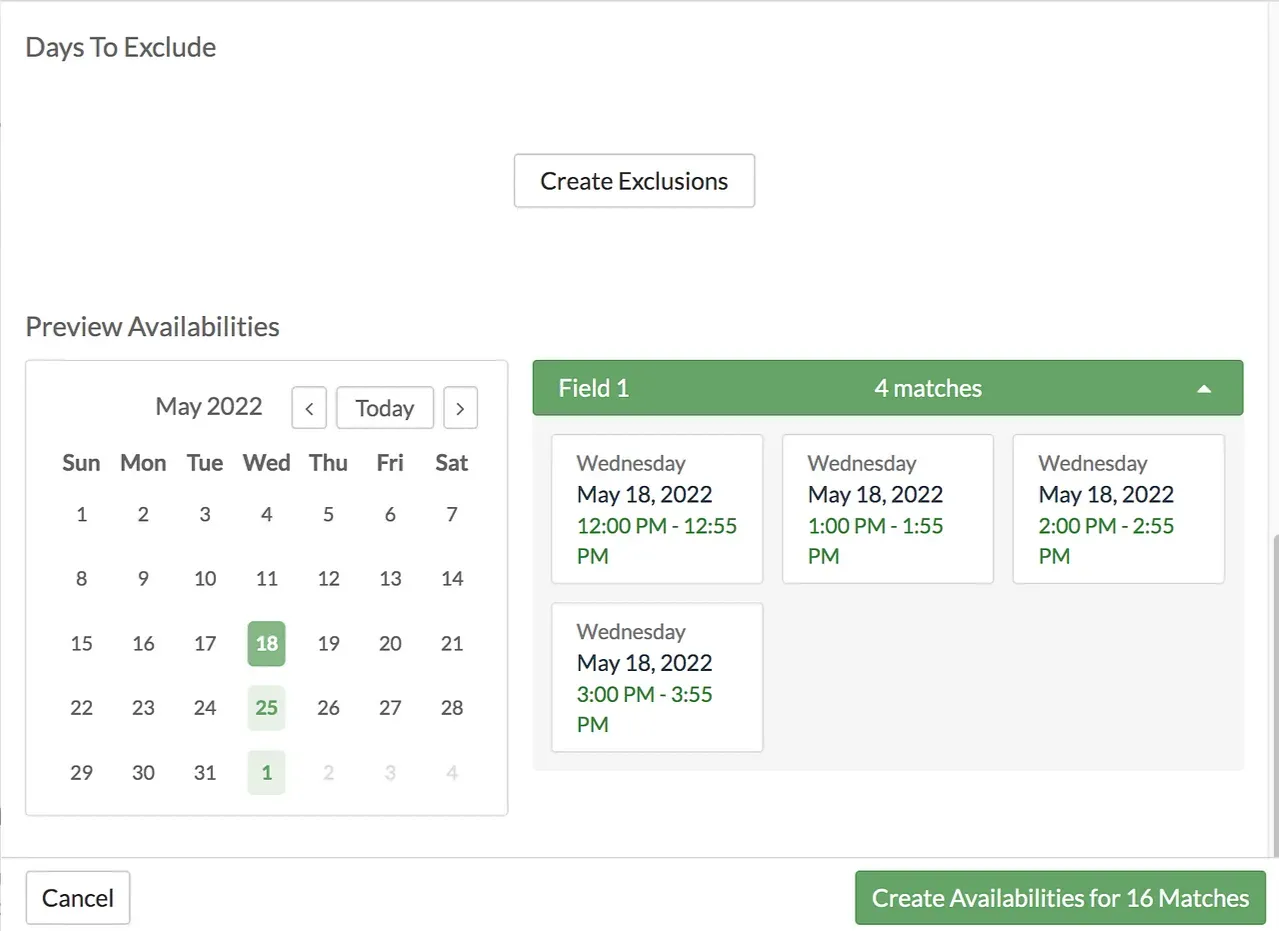
- You can create exclusions if you’d like to exclude specific dates (like holidays) from the schedule.
- Preview the availabilities you’ve created.
- Tap on “Create Availabilities for [X] Matches”.
- Repeat steps 1–5 as necessary until you have created enough available time slots for all your matches.
F) Schedule Balance
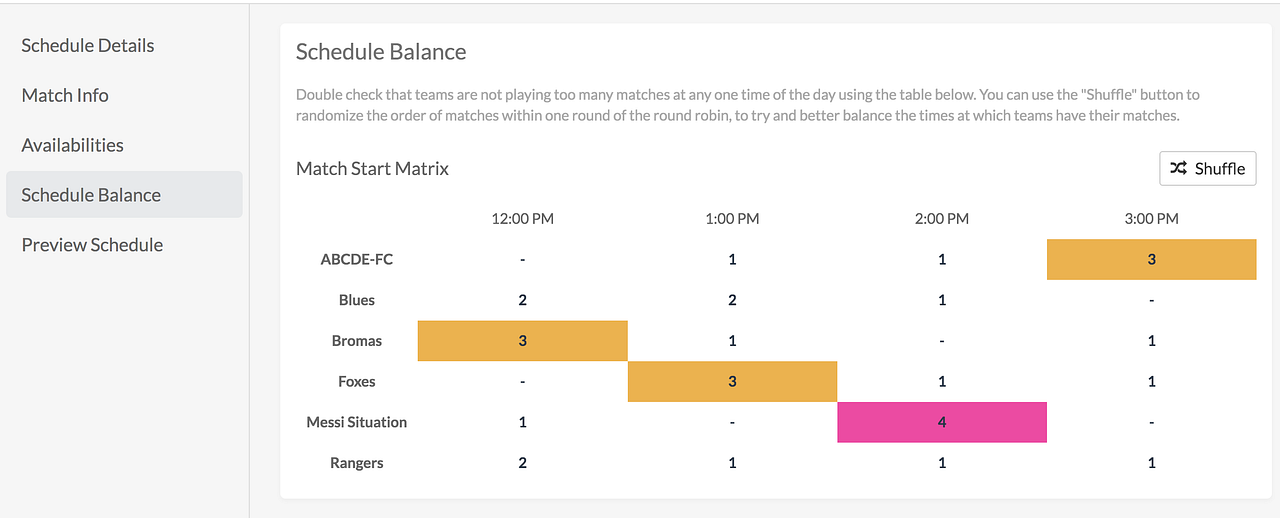
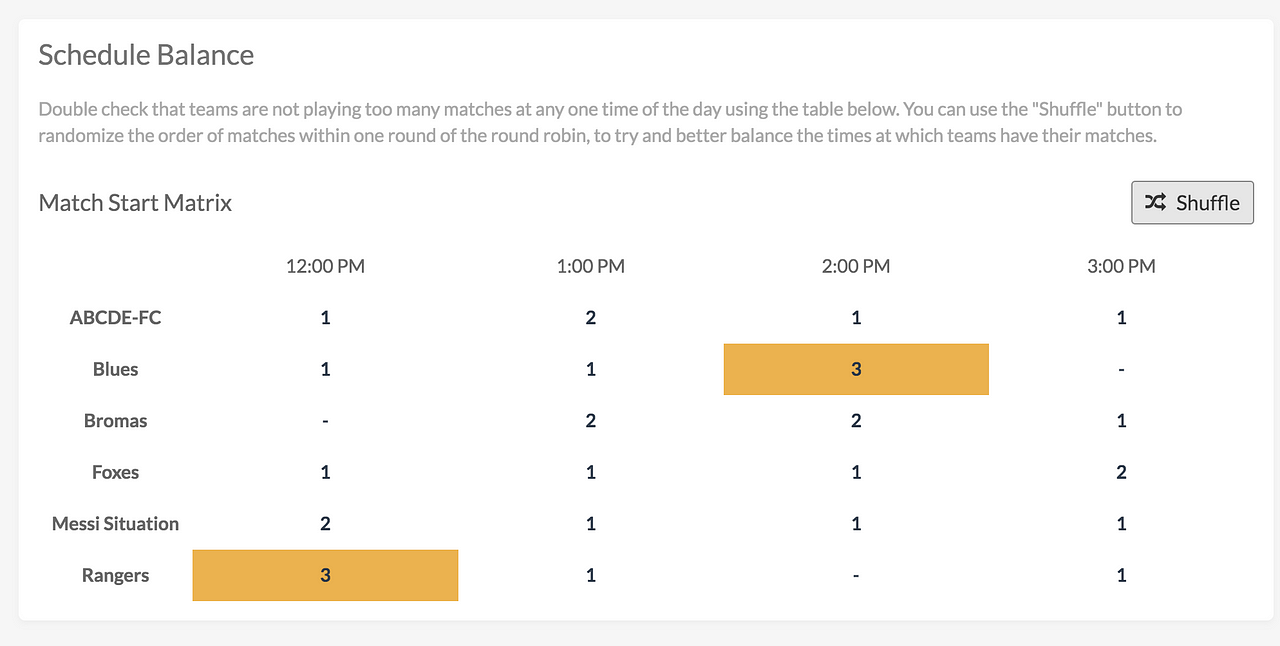
Double check that teams are not playing too many matches at any one time of the day using the table below. You can use the “Shuffle” button to randomize the order of matches within one round of the round robin, to try and better balance the times at which teams have their matches.
Once shuffled:
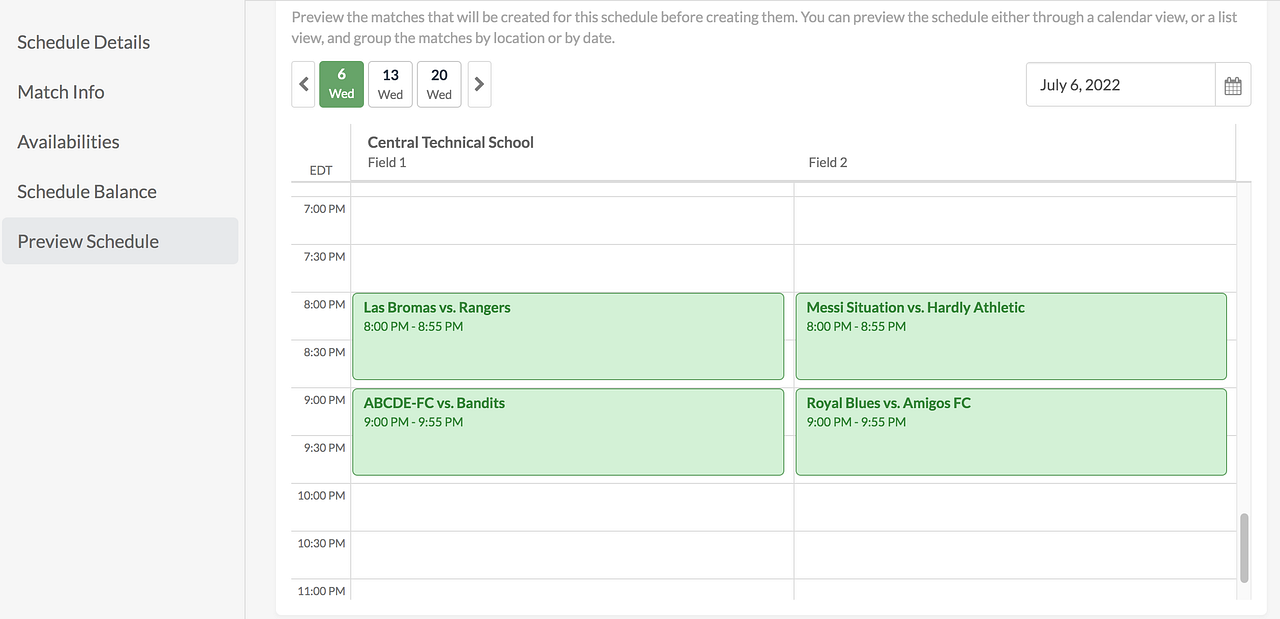
G) Preview Schedule
You can also download it as a CSV at this step.
H) Create/Save Round Robin schedule
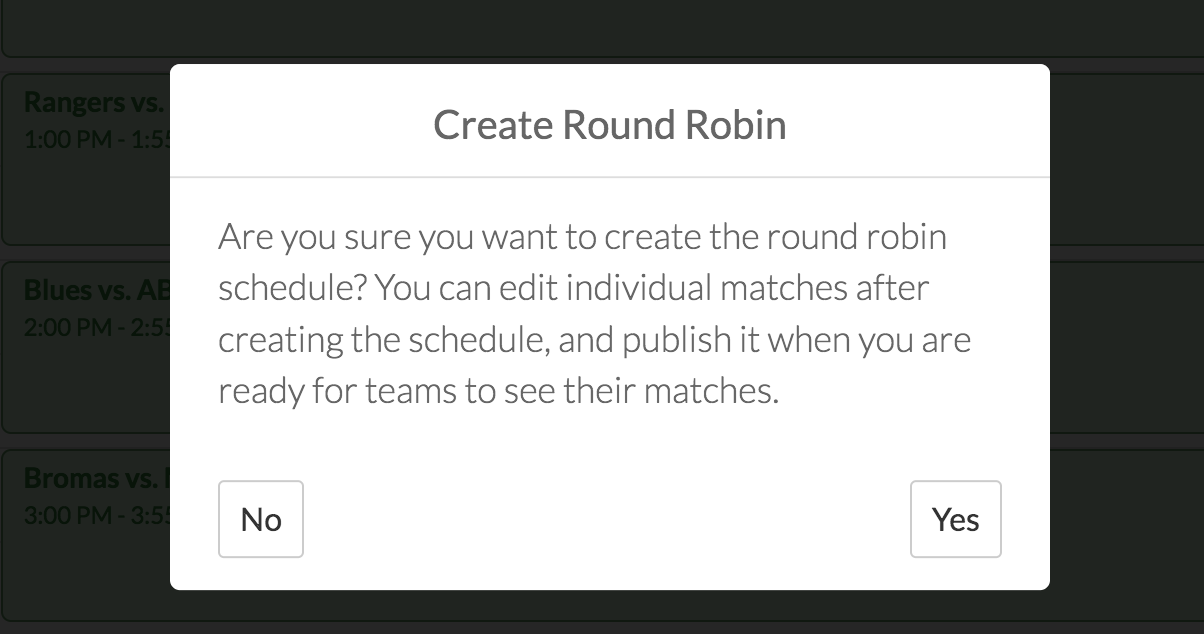
- Once you’ve created enough availabilities for all the matches in the league, tap on “Create Round Robin Schedule” and you’ll be asked to confirm you want to create the round robin schedule.
- Tap “Yes”. The schedule will be created in the “unpublished” state.
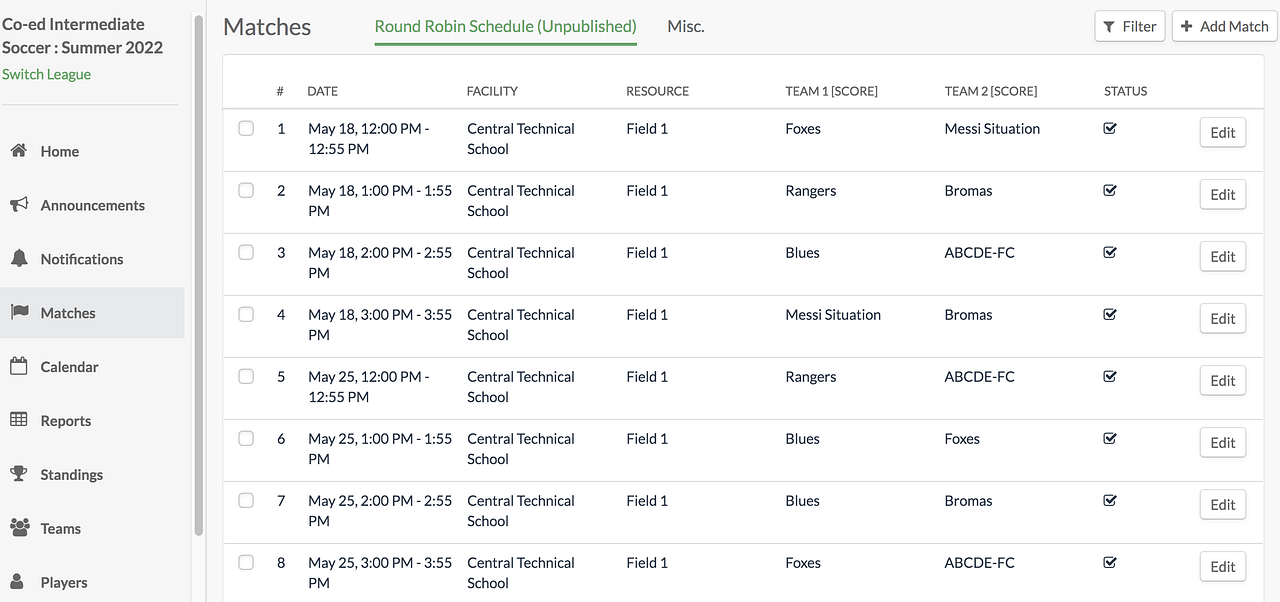
- You will be brought back to the Matches view where you can see the upcoming scheduled matches.
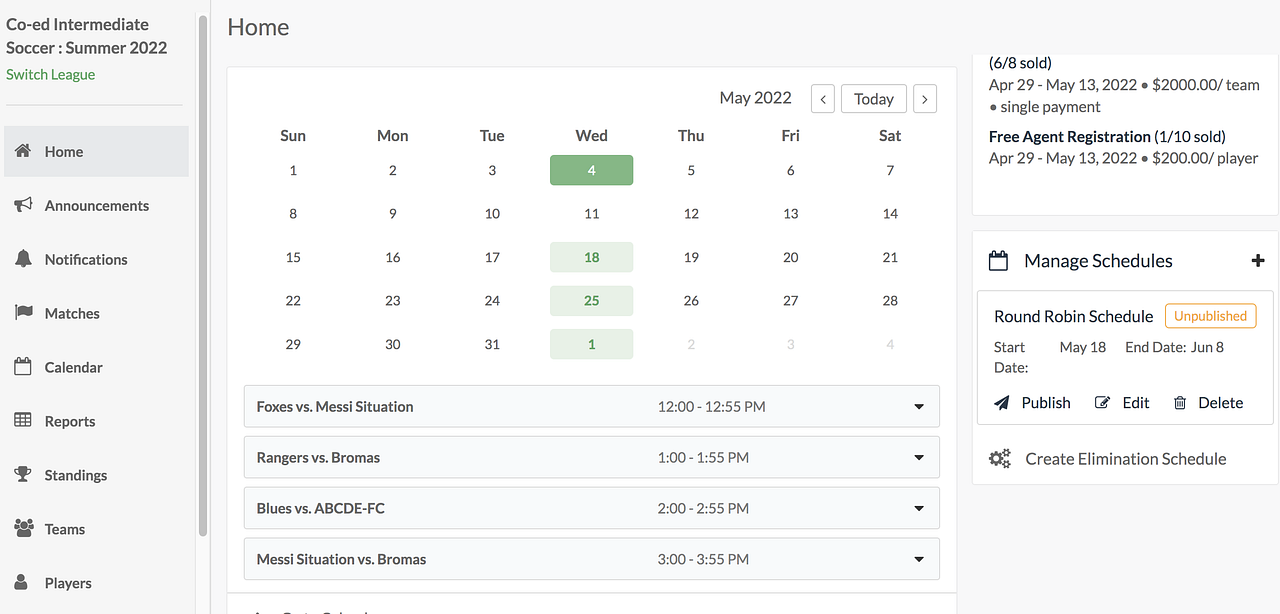
If you are ready, You can Publish the schedule from the Home page. Otherwise, you can review it and make edits (see details below).
I) Review and edit matches
Before the schedule is published as well as once the schedule is published, the admin can still make edits to specific matches, or to matches in bulk.
Note: notifications will be automatically sent to players (e.g. if match times are changed) ONLY if the schedule is published and if you enable notifications for those specific changes.
- To view the whole list of matches, simply click on Matches from the navigation bar.
- On the Matches page, you’ll see the list of all matches sorted by date.
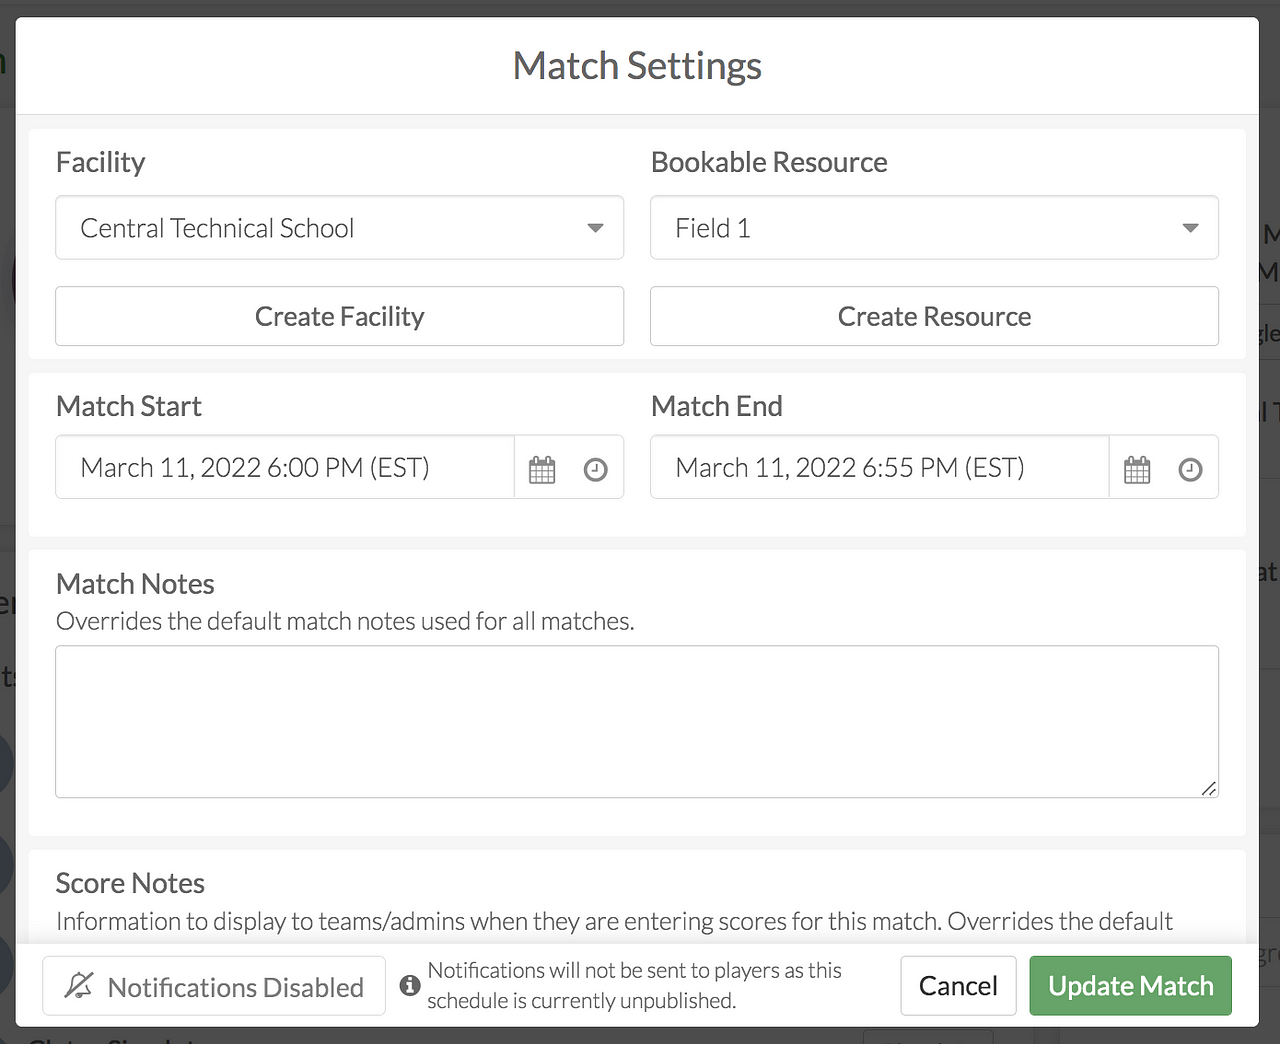
- Click on the Edit button in the match row to replace, switch, or modify teams, or change the date/time/location/field for a specific match.
- Click on multiple checkboxes to activate the Bulk Edit button and make the same changes to multiple matches at the same time.

- To view and edit additional match details such as the roster, or assign a ref to a match, click anywhere in the match listing row.
- You can view the players on each team’s roster, as well as if they have RSVP’d for the match, and you can check them in through this page
- To make edits to match details, click on the Edit icon to the right of “Details”
- You can assign a ref to the match by searching for their name in the Staff List search bar and clicking Add when their name comes up.
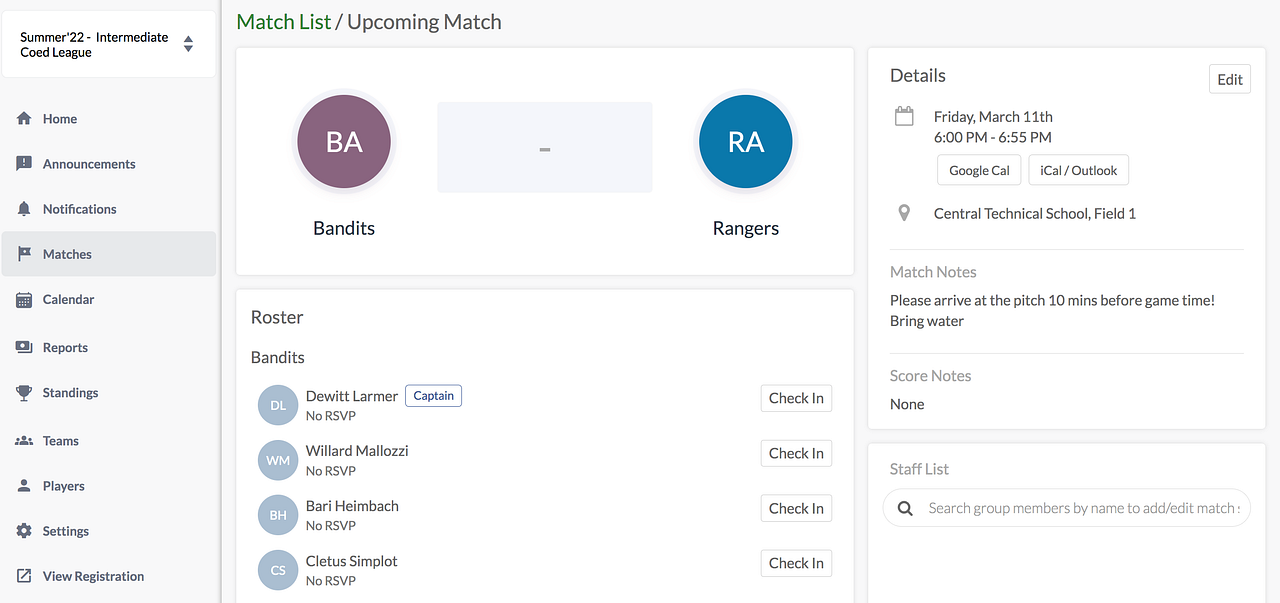
- If you click on the Edit button under Match details, here’s what you can edit:
J) Publish schedule
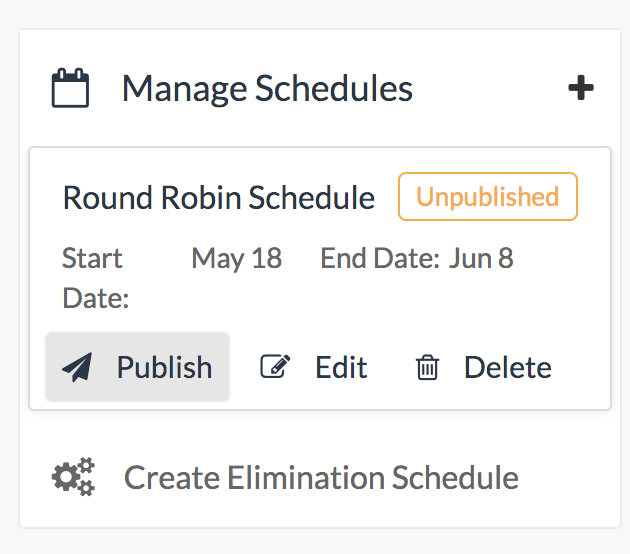
- When you’re happy with your schedule of matches, navigate back to the league Home page, and tap “Publish” under Round Robin Schedule.
- Once the schedule is published, all registered players will receive a notification to check out their new match schedule!
K) Players’ View
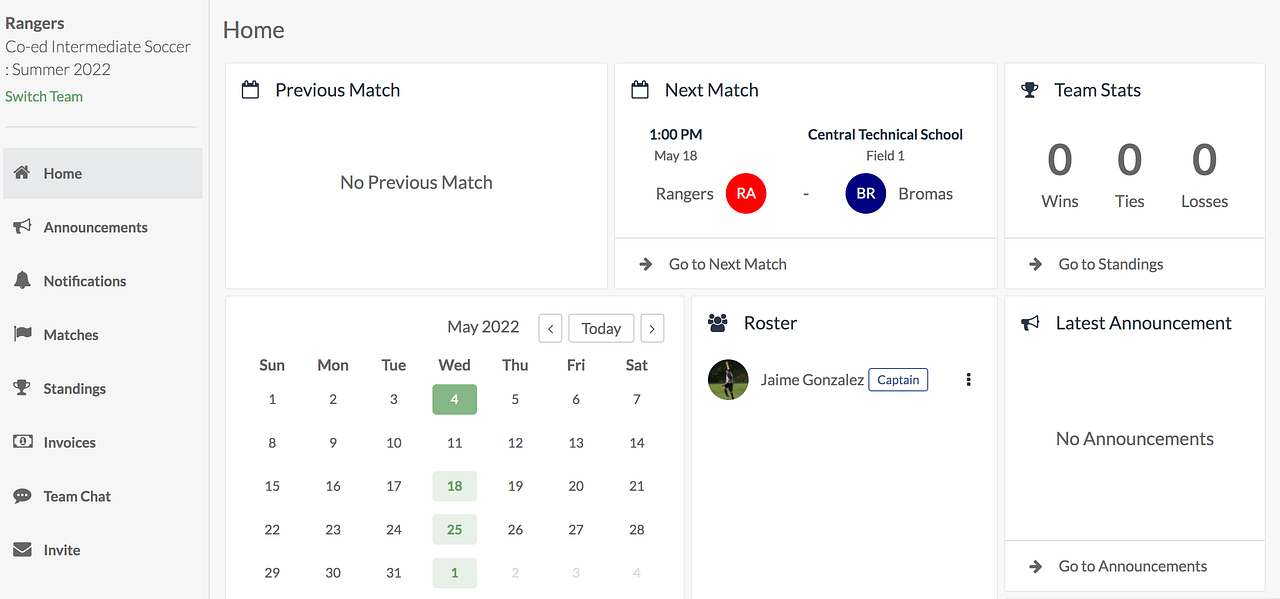
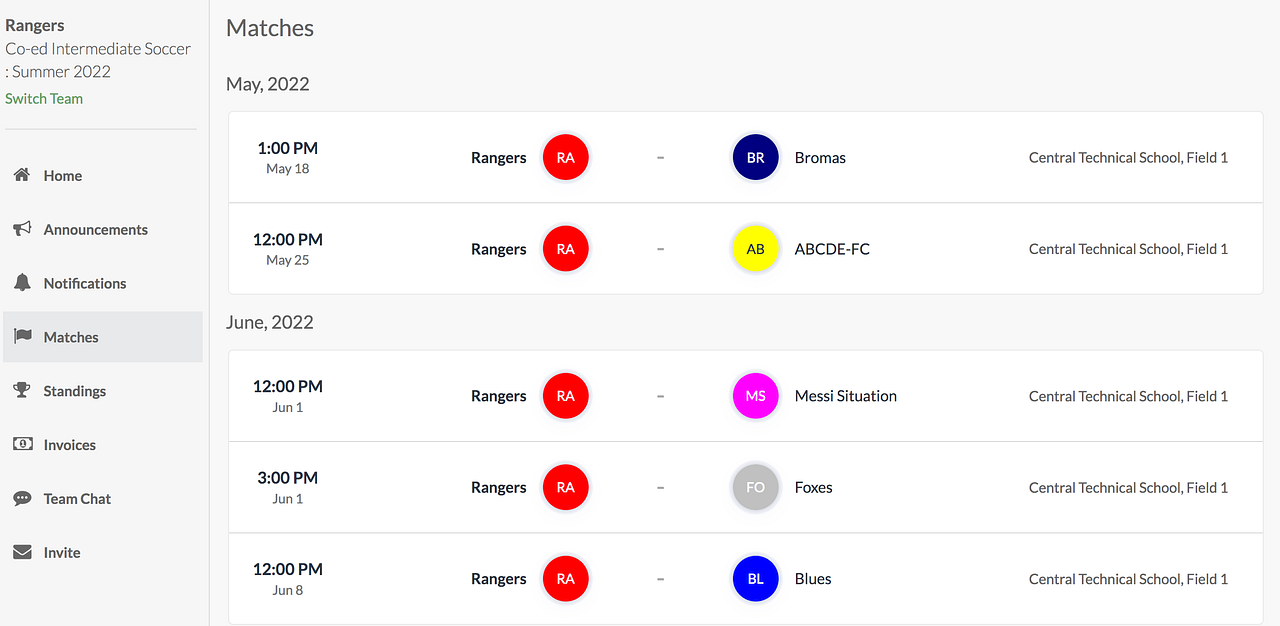
- When the schedule is published, registered players will receive a notification and this is what they will see via the web view:
Dashboard view
Matches view
And you’re done!
Congratulations on making it to the end!
We hope this tutorial was helpful in getting you started with OpenSports Leagues/Tournaments. There’s a tonne more features that we didn’t cover in this tutorial (RSVPs, checkins, match reminders, score-keeping, elimination schedules, etc.) and you can check those out in our other guide!
Our next leagues guide, Part III) is about setting up an elimination/cup/playoff round using the league standings.
Don’t hesitate to reach our if you have any questions on how the OpenSports Leagues/Tournaments can be set up for your organization.
Questions? Send them our way: support@opensports.net